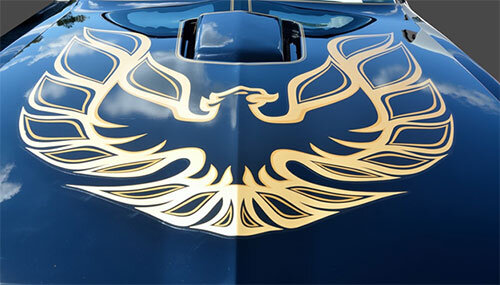
If you want to make your car stand out, custom decals are the best choice. You can let your opinion be heard or you can use them to market your business. While there are so many retailers that can print and apply customized decals to your car, it is best to choose a provider after careful consideration. Having a better understanding of the process will help you choose the right professional.
The Steps:
Identifying a Spot
Before a decal is applied, the experts first determine the spot on the vehicle where it needs to be placed. This is especially important for bigger graphics that may extend to more than one body component. The area is properly assessed before taking a decision.
Decal Measurement
The professionals then measure the decal by placing it on the vehicle. The decal is then held against the car to get the right idea of how it will look. Protective backing is left on the decal so that it does not stick to the surface while being held against the car.
Moreover, a tape measure is used to keep the decal in center. This gives a solid sense of exactly where the graphic has to be placed. In case identical decals have to be placed on both the sides, it will be ensured that they are at equal distance from minimum three points to make them match on both the sides. The distance is measured from the door, trunk lid and window.
Use of Masking Tape
Professionals use masking tape to mark the location. After measuring out the area where the graphic has to be placed, masking tape is placed on every corner of where the graphic has to be applied. Masking tape acts as a guide when the decal is finally applied. The tape does not damage the car paint.
Also Read: Vehicle Graphics: The Cost-Effective Advertising Solution
Cleaning the Area
A mild cleaner and a soft cloth are used to clean the car’s surface before the application. Since rubbing alcohol evaporates very quickly, it is an extremely common choice for most companies.
The Cleaned Area Is Dried
The professionals allow the cleaned area to sit for some time so that it dries completely. Decals never stick well on wet surfaces, so the area should be dried and cleaned with a towel before moving on.
Application
The tape on the vehicle is used for guidance as the team starts to apply the extreme end of the decal onto the car. The corner is pressed firmly, then a flat tool is used for pressing the entire decal down. The decal is pulled tight as it is pressed onto the car to prevent bubbling. Utilizing a tool ensures there is enough pressure on the whole decal to force the bubbles out. Finally, after the decal has been applied and given enough time to dry out, the transfer tape is removed. The end result is a successfully put together vehicle graphic.

